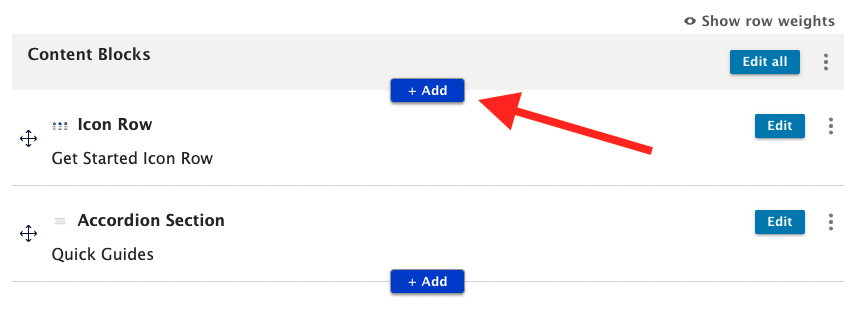
Content Blocks can be placed on Page or Story items.

Add Content Blocks

1.   While editing a Page or Story item, find the Content Blocks heading.

2.   Click the "+Add" button.

Image
Admin interface to add content blocks to a page, with an "Add" button in the center
  • Note: If you have multiple Content Blocks, you will also have multiple "+Add" buttons – one at the top of the list, one at the bottom, and one between each set of blocks (which will appear on hover). These allow you to more easily place the blocks in your desired location.
Image
Add Content Block modal window showing the list of available content blocks for users to select from

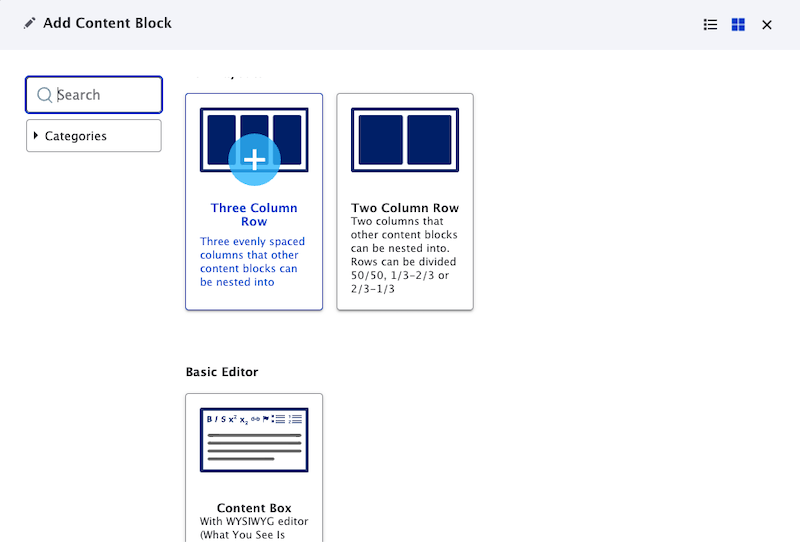
3.   In the Add Content Block window, find the desired Content Block. You can browse the list or use the search box.

4.   Hover over the desired Content Block and click the "+" icon.

    Fill out the Administrative Title

    When adding new Content Blocks, filling out the Administrative Title field is recommended. The field value will not display on the front-end of your site, but it will help you better organize and find your content.

    Arrange Content Blocks

    1.   Collapse: Click the Collapse button to only see a small portion of content entered into the content block.

    2.   Remove/Duplicate: Click the icon with 3 dots to reveal options to either remove or duplicate the content block.

    3.   Rearrange: Once you've added two or more content blocks, you can put them in a different order.

    • Select a handle (the arrows icon on the left side) to drag the item up or down to a new location.
    • Alternately, you can click Show row weights in the upper right to enter a numeric weight that will order the blocks.
    Image
    A Content Box content block with collapse, remove, and duplicate buttons, as well as an arrow icon allowing users to drag and drop into a new order