There are two ways to add events:
- Enter them into the Duke Event Calendar and then import them by group or relevant tag via feeds (recommended).
- Manually enter them into your Drupal admin site.
Your site can include events imported from Duke Event Calendar via feeds, events added directly through Drupal, or a mix of both.
Events will automatically display on your site on two list pages: /events and /past-events. The system will automatically display them on the correct page based on the event's date.
1. Duke Event Calendar
adding events with duke event calendar
1. To manage your events on the Duke Event Calendar, go to https://calendar.duke.edu and look for the Calendar Administration information in the right sidebar.
- Learn how to add an Event Feed from the Duke Event Calendar.
- If you do not want your events to appear publicly on calendar.duke.edu, mark your event with the category “local.” Local events will only appear in feeds (and therefore on your website).
- All Event info from the Event Calendar will be pulled into your site, including images.
2. To set up your feeds on your Sites Pro site, refer to the Duke Event Calendar Feed directions.
- All Event categories you use on the Event Calendar will be imported into your website's Categories taxonomy.
editing events from duke event calendar
To edit an Event from a feed:
- Fields populated by the feed are grayed out and not editable in Drupal. Changes to these fields must be made directly in the Duke Event Calendar instead.
- Any changes made to your events in the Event Calendar will automatically be imported into your site within 15 minutes.
- If formatting from your Event's description field on calendar.duke.edu is not carrying over to your Sites Pro site, you will need to update your calendar feed's URL.
- Text fields that are not grayed out are editable in Drupal.
- Content entered in these fields have no relation to the Event Calendar and will only display on your site.
- Examples include: Featured Image, Cost, Additional Links, Additional Location Information, Alternate Link.
Editing Categories
Events imported from a feed can be tagged with Categories two different ways:
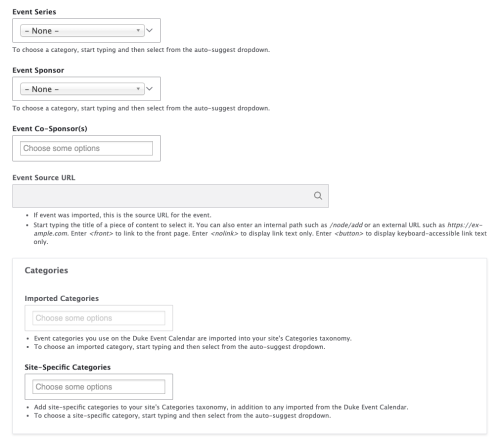
- Imported Categories: All Event categories you use on the Event Calendar will be imported into your website's Categories taxonomy. These can only be edited from within the Event Calendar and not from your Drupal admin website.
- Site-Specific Categories: If you need more granular or unique Categories that don't make sense for the broader Event Calendar, you can manually enter Category terms that are specific to your individual website. These will not be overwritten by any data from the Event Calendar feed.
The difference between these two types of Categories is only visible to site editors on the Event edit screen. Elsewhere, all categories will appear in one intermingled list.

How to Identify Event Items from the Duke Event Calendar
To confirm whether an Event on your site is being pulled in from the Duke Event Calendar, click Content in the Drupal admin bar, and search for that Event.
If the Author is listed as "Anonymous (not verified)," the Event comes from the Duke Event Calendar.
You can also go to the Event's edit screen in Drupal. On imported Events, most fields will be grayed out and uneditable.
Removing events from duke event calendar
If an event is canceled, visit the Duke Event Calendar and change its status from Confirmed to Cancelled. Optionally, you can also add "CANCELLED" to the event's title.
If an event was a mistake or test, delete it from the Duke Event Calendar and delete or unpublish it on your site.
2. Manually Add Events
Users must have the Event Creator role to access this feature.
Fields relevant only to imported events will be grayed out and not editable.
IMPORTANT: DEFINE YOUR TAXONOMY TERMS FIRST
Set up your Categories, Event Status, Series, and Sponsors taxonomies before manually creating any Events.
Add an Event
(* = required field)
1. Go to Content in the main navigation menu, and select the Add Content button.
2. Select Event from the Add Content page.
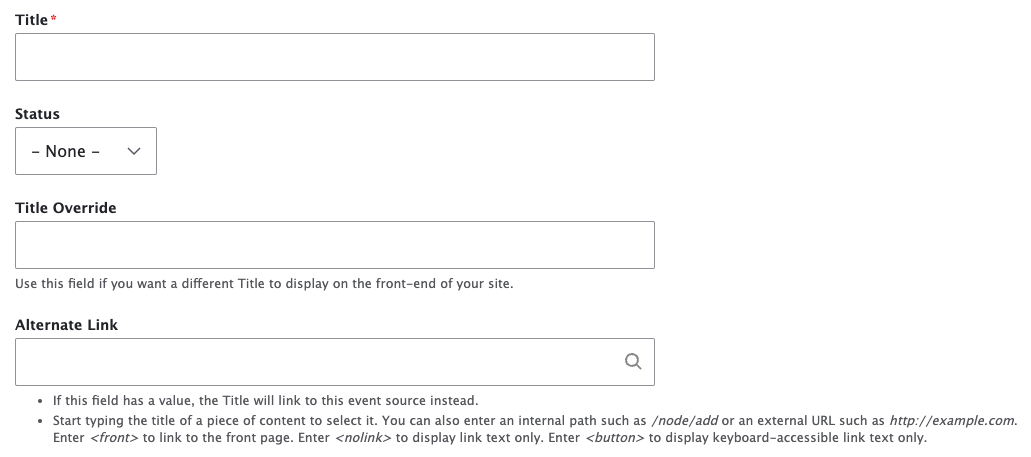
3. Enter required Title*.
4. Add additional information as desired:
- Status: Select a term from the Event Status taxonomy, such as Confirmed or Cancelled.
- Title Override: Use this field if the Title of the Event item is long and you want a shorter Title to display on the front end of your site.
- Alternate Link: If an Event item is hosted on another site, you can put the link here and the Title will link to this URL.

5. Add Featured Image.
- The Featured Image will display on the Event list pages (/events and /past-events), in Event Lists, and will be the prominent image on an individual Event item.
- Featured image will be cropped to a 3:2 ratio. High quality, landscape-oriented photos work best.
6. Enter a Start Date* and End Date* and time that will appear on the front end of your site. The seconds field is included as a system default, but it will not display to end users.

7. Add Location information:
- Location Name: Type the name of the venue
- Location Link: The venue's URL can be internal or external to your site.
- Additional Location Information: Use this WYSIWYG field for other helpful information.
8. Add additional information as desired:
- Presenter/Speaker: This is a text field and does not link directly to any Profiles or Scholars Profiles. You may type multiple names.
- Cost
- Webcast URL: This may be internal or external to your site.
9. Add descriptive event text as desired:
- Description
- Click Edit Summary to add optional summary text that will appear in lists.
- Additional Info: This field is especially helpful on imported events, to add site-specific details that may not make sense for a Duke Event Calendar listing.
10. Add Contact information in the Contact Name, Email, and Phone text fields.
11. Provide additional details using the More Event Info and Additional Link(s) fields, which allow internal or external URLs.
12. Tag your Event with all applicable taxonomy terms. If you need to add or revise terms, refer to the Taxonomies documentation.

- Select any relevant Event Series from the Series taxonomy. Start typing and then select from the auto-suggest dropdown.
- Choose an Event Sponsor and Event Co-Sponsor(s) from the Sponsors taxonomy. You may only have one Sponsor, but multiple Co-Sponsors.
- Categories are used to filter items on the Events List Pages and can be used when placing Event Lists on a Page. For manually added events, use the Site-Specific Categories field.
13. Disregard the Event Source URL and Duke Event Calendar Feed Imported Image fields, which are not necessary for manually entered Events.
14. Click Save to publish to the website or deselect published checkbox to save as a draft.
- You can access Unpublished content on the administrative side of your site in the Content section.