Test.docx (11.52 KB)
Files Supported
Document files supported include: .doc, .docx, .pdf, .xls, and .xlsx
Insert documents into content one of three ways:
- Upload new documents directly into your content.
- Insert documents that already exist in your Media Library.
- Link to documents that already exist in your Media Library.
Uploaded and inserted documents (methods #1 and #2) will display like the following image, while linked documents (#3) will appear as a text link, as in this example:
1.) Upload new document files via the Content Editor
(* = required field)
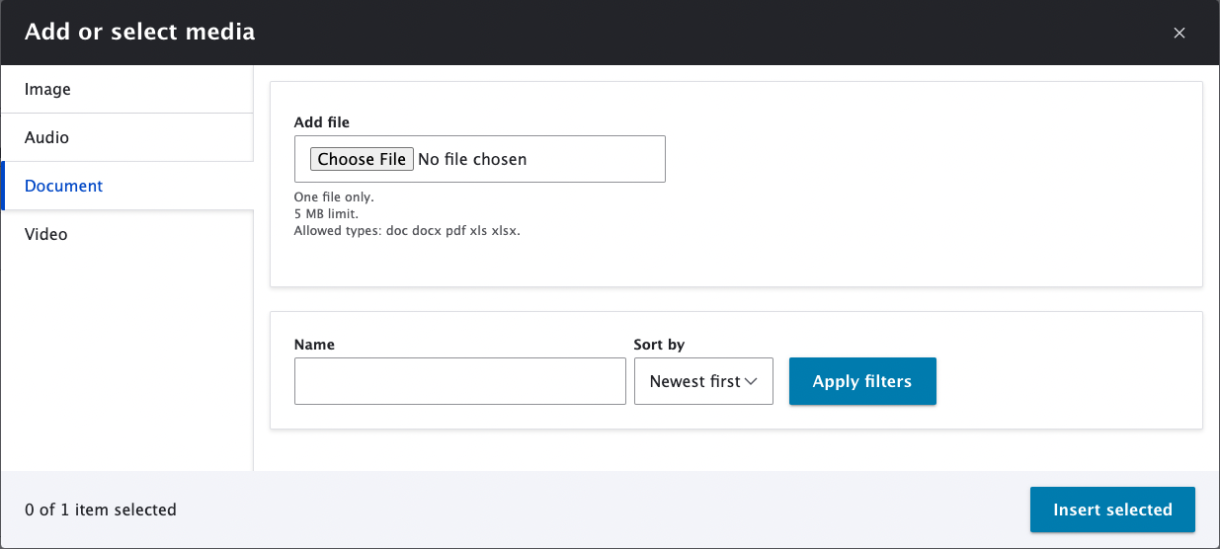
1. Select the Media button in the content editor (WYSIWYG).
2. Click Document on the Add or select media screen.
3. Click Choose File.
Image
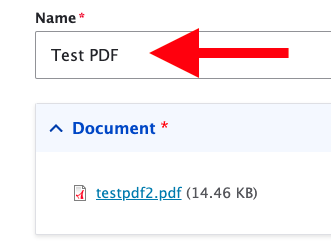
4. Another screen will appear with additional fields:
- The Name* is the file name of your document. You can change the name if needed.
- The Published checkbox defaults to the document being published once you click Save. If you are working on a draft of a document and do not want it be live, deselect the Published checkbox. You can access Unpublished documents on the administrative side of your site in the Content > Media section.
Image

5. Click the Save button. Then click the Insert Selected button.
2.) Insert existing documents from your Media Library
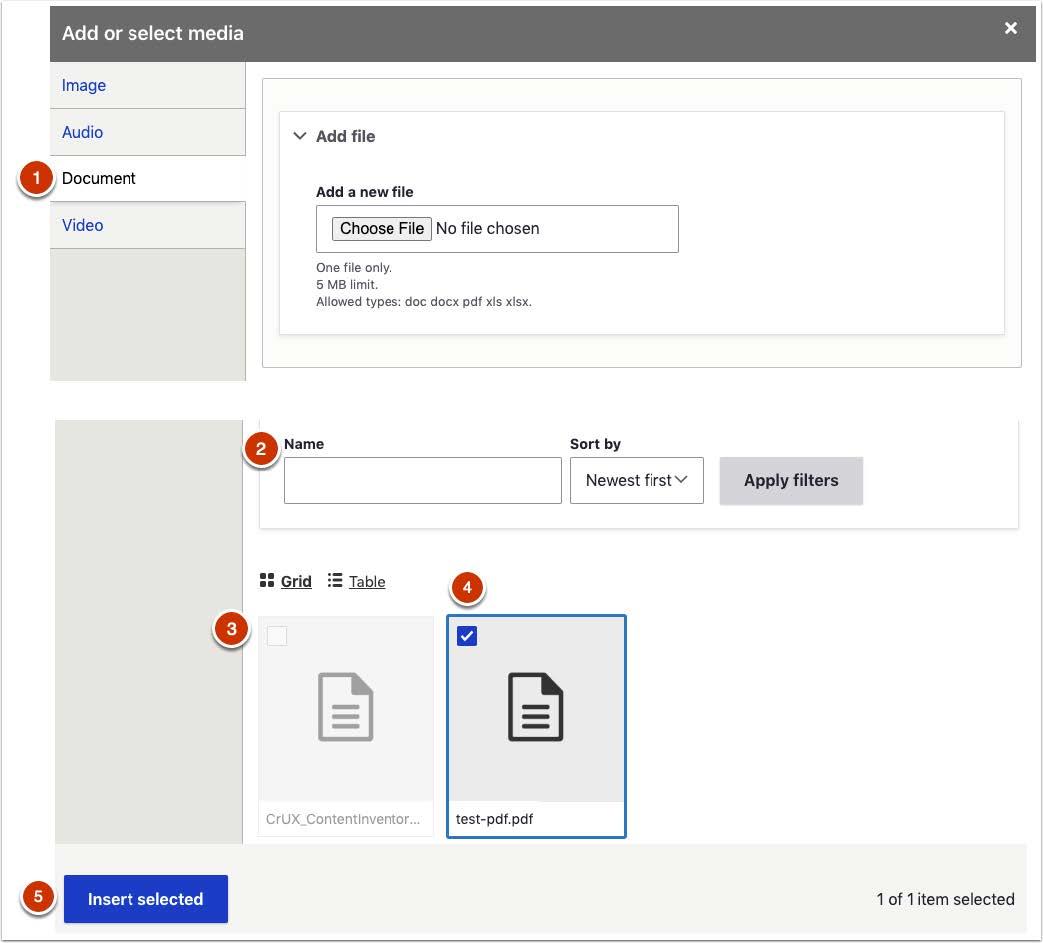
1. Select the Media button in the content editor.
2. Click Document [1] on the Add or select media screen. Scroll down this screen until you see a search box and a grid of documents.
Image
3. Search [2] for a document by name (the Name field of the document, not the Document filename) or Browse [3] through the documents in the Media Library.
4. Select the checkbox [4] next to the document you want to insert.
5. Click the Insert selected [5] button.
6. After you add a document to the WYSIWYG editor, you can add a caption and change the alignment and display size.
Image
3.) Link to existing documents from your Media Library
Review instructions for Linking Directly to Files (e.g., PDFs) on the Add Links page.
Edit or replace documents
Review the Editing and Previewing Media section on the Media Library page.
Use the Media content block
You can also add Document files to Pages and Stories using the Media content block.