The Media Library stores uploaded media items for easy reuse throughout the site, so you won't have to re-upload and manage each instance of the media item separately.
Accessing the Media Library
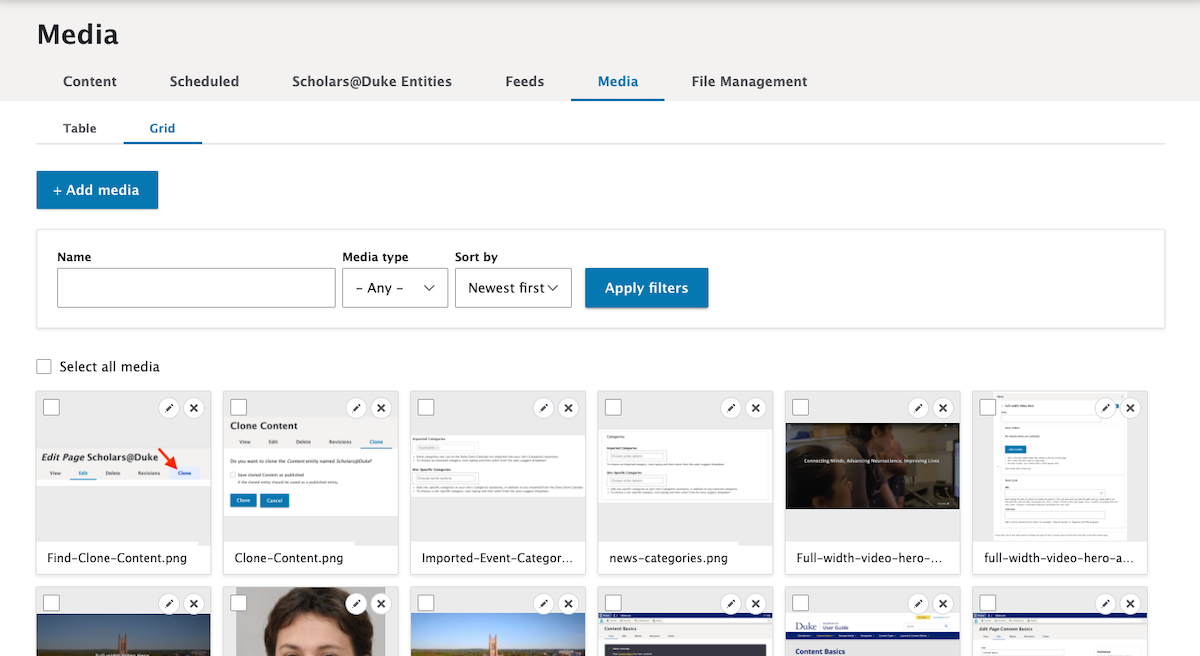
1. Go to Content > Media in the main navigation menu.

Using the Media Library
List View
2. Click the + Add media button if you would like to add a new Audio track, Document file, Image, or Video.
3. All of your Media (audio tracks, document files, images, and videos) will display in a list format.
4. You can choose to Edit, Clone, or Delete media items from the Media library.

Grid View
5. Select Grid view in order to see larger versions of your images in a grid format and to be able to filter the media list.
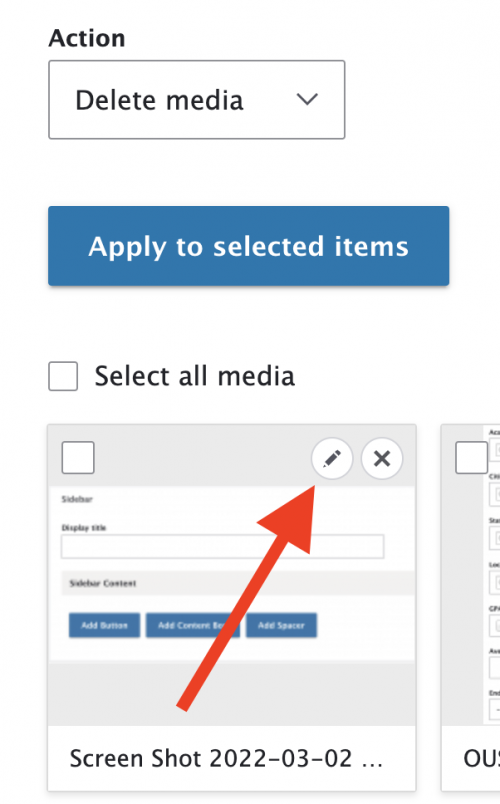
6. The Action menu allows you to Delete media, Publish media, and Save media.
- Select the Action you want to perform.
- Choose media items by selecting the checkbox next to each media item you want to apply the action.
- Click the Apply to selected items button.

Editing and Previewing Media
1. Click the Pencil icon on the desired piece of media.

2. From this Edit screen, you can update the media's name, alternative text, focal point, status, and even replace or update the media file itself.
3. From the Edit screen, click the Preview link below the media preview to view how that media displays at different sizes.

To replace a file:
- Image files: Click Remove, and then re-add the image.
- Audio, Document, and Video files: By default, the media library will overwrite the original file. This is best practice.
- If overwriting, the replacement upload needs to be the same file type as the original.
- Overwriting the file will:
- Preserve the URL so direct links to it will not break.
- Prevent old versions of the same file from accumulating in the system. You will not need to manually delete previous versions from the system.
- One instance where you may want to uncheck the checkbox is when the file name itself is problematic - for example, if it contains special characters or spaces. These may keep the file from opening correctly in a browser.

Deleting Media
A media item must be deleted from both the Media Library and File System to be completely taken offline. Note that neither of these actions can be undone.
1) First, delete it from the media library
Start at the Media Library, and delete the file one of multiple ways:
a. List View – delete a single item:
- Click Edit or select Delete from the dropdown (which displays when you click the downward arrow/carat next to the Edit button), and then click Delete on the following screen.
b. Grid View – delete a single item:
- Click the Pencil icon or X on the desired piece of media, and then click Delete on the following screen.
c. List or Grid Views – delete multiple items:
- Select the checkbox(es) of the media you wish to delete, or the Select all media checkbox.
- Choose Delete media from the Action dropdown, and click Apply to selected items.
- Click Delete on the following screen.
Please note any of these steps will delete the media item from the Media Library, but it does not delete the file from the system completely. You must continue on to step #2.
2) then, delete it from the file system (important!)
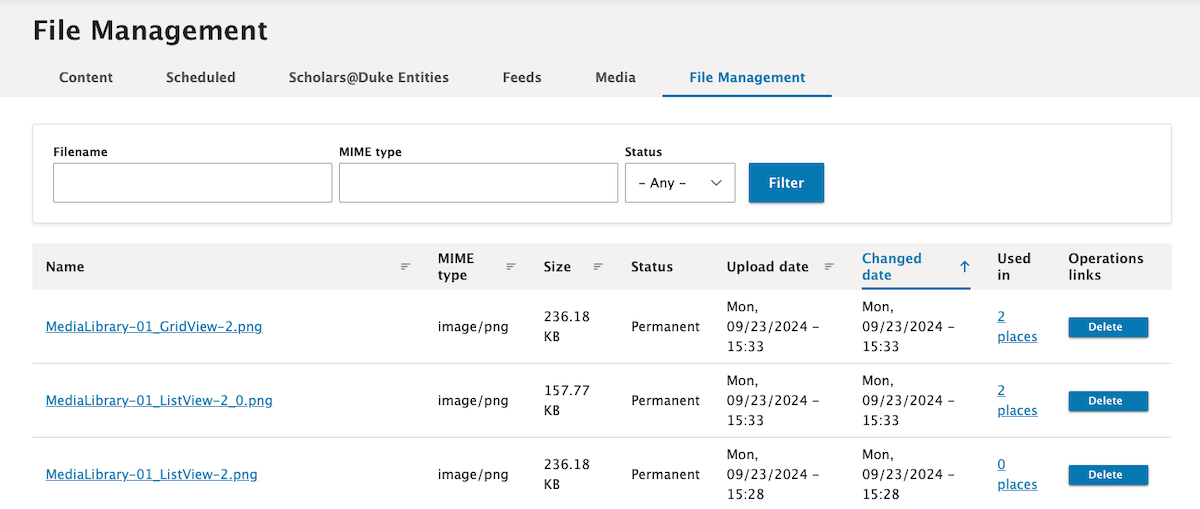
A user with the Site Admin role should delete the media file from the File Management Tab. This is particularly important if the file contains misleading or sensitive information. This tab is only available to Site Admin users – if one is unavailable in an emergency, you may contact the Sites Pro team to assist.
- Select Content > File Management in the Drupal admin menu (/admin/content/files).
- Find the media item to be deleted.
- Confirm it is listed as being "Used in: 0 places."
- If it is still being used, click the "places" link to find and delete all instances of it first.
- If it shows "2 places" but only lists one, this likely means you must complete the steps above to delete it from the Media Library.
- If the item was very recently deleted, it may take short while to show as being used in 0 places, as the update propagates through the system.
- Once it is no longer being used anywhere, click the corresponding Delete button.
